Monday 13 December 2021

Octoprint on LG G4 - Ender 3 (Pro)

 I have read "installing octoprint on a smartphone" on reddit and decided to do it. Here is my documentation about how to install Octoprint on an Android-Phone (LG G4) 

For any rom, if you want to connect it to Ender 3, you need "ch341" driver added/activated in the kernel or you need a custom implementation of it (look for octo4a program). You could understand it by connecting the phone with a USB OTG cable to your printer and execute command "ls /dev | grep tty". If  there is "ttyusb" or "ttyacm" , it means that kernel has the driver. If kernel does not have the driver you have two options: 

  1. You need to compile a kernel with driver support. Also keep in mind that kernel needs to support "loopback" functionality to host a virtual linux system and accept/direct connections to that virtual linux over its loopback.
  2. You can install octo4a, which installs custom a ch34x driver. and you need to mount the serial pipe of the octo4a (you can check that part from: https://github.com/d4rk50ul1/klipper-on-android


Installing Ubuntu  - "Linux Deploy"

Before installing Ubuntu, be sure to have the serial drivers installed (kernel) on the phone, otherwise you will waste too much time.

1. Install Busybox 
Leave folders as default. 

2. Install LinuxDeploy

Newest Ubuntu that i succeded to install is Debian Buster

3. Open LinuxDeploy and go to settings and check 
  • Lock-wifi
  • Wake lock 
  • Auto-start
  • Auto-start delay : 30 seconds
  • Debug : Useful to understand if something goes wrong (like kernel version is old etc.) 


Go to properties menu and and configure below: 
  • Distribution: debian buster
  • Architecture: arm64
  • Username: pi    (octoprint scripts are for raspberry-pi installation, pi user will make our job easier)
  • Password: your-password 
  • Installation type: file  (default) 
  • Installation path: $(EXTERNAL_STORAGE)/linux.img  (default) 
  • Image Size: 4096 MB
  • enable ssh
  • Init: enabled 
  • Mounts: enabled
  • Mount points: source: /sdcard  target: /sdcard 

Start installation


To eliminate local network problems, first try to connect to linux over the phone itself. ssh to "localhost"

Change root password with command "sudo passwd root" 

Installing Python & Octoprint

Default Python version on Debian Buster is 2.7.16 which is ok for octoprint, klipper etc. 

1.Change user shell from sh to bash, and close and restart your ssh session. 
sudo usermod --shell /bin/bash pi
2. Update "sources.list" file and add the sources below
sudo nano /etc/apt/sources.list
deb http://deb.debian.org/debian buster main contrib non-free
deb-src http://deb.debian.org/debian buster main contrib non-free
deb http://deb.debian.org/debian buster-updates main contrib non-free
deb-src http://deb.debian.org/debian buster-updates main contrib non-free
deb http://deb.debian.org/debian buster-backports main contrib non-free
deb-src http://deb.debian.org/debian buster-backports main contrib non-free
deb http://security.debian.org/debian-security/ buster/updates main contrib non-free
deb-src http://security.debian.org/debian-security/ buster/updates main contrib non-free
3. Upgrade ubuntu and install prerequisites 
sudo apt-get update
sudo apt-get upgrade
sudo apt-get install build-essential checkinstall -y
sudo apt-get install libreadline-gplv2-dev libncursesw5-dev libssl-dev libsqlite3-dev tk-dev libgdbm-dev libc6-dev libbz2-dev -y
sudo apt-get install python-pip python-dev python-setuptools -y
4. Upgrade PIP (also for virtualenv)
sudo pip install wheel
sudo apt install virtualenv
sudo pip install --upgrade "pip < 21.0" virtualenv virtualenvwrapper --ignore-inst

6.Create and enter into virtual env. Install virtualenv with 
mkdir venvs
cd venvs/
virtualenv octoprint
source /home/pi/venvs/octoprint/bin/activate
7.Check python and pip version inside virtualenv (python 2.7.16, pip 20.x)
python --version
pip install --upgrade "pip < 21.0" 
pip install --upgrade setuptools
pip --version
8. Install octoprint (inside venv)
pip install wheel
pip install octoprint
8. Start octoprint
/home/pi/venvs/octoprint/bin/octoprint serve

Start Octoprint On Debian Boot Automatically
Download necessary script files: 
wget https://github.com/foosel/OctoPrint/raw/master/scripts/octoprint.init && sudo mv octoprint.init /etc/init.d/octoprint
wget https://github.com/foosel/OctoPrint/raw/master/scripts/octoprint.default && sudo mv octoprint.default /etc/default/octoprint
sudo chmod +x /etc/init.d/octoprint sudo systemctl octoprint enable
Change the daemon path in "/etc/default/octoprint" file with vi/nano (whatever text editor is your favorite) to: 
sudo nano 
DAEMON=/home/pi/venvs/octoprint/bin/octoprint

Screen Off - Sleep Problems
For an always on Linux installation on Android, some battery and cpu optimization settings need to be changed otherwise Linux becomes unreachable when screen is of after a while: 

1. Change wifi settings to "keep wifi always on" 

2. Install Wake-Lock Rewamp: Select "Screen_DIM_wake_lock" option for phone not to (deep)sleep when the screen is off. 

3. Change Battery Settings: Disable optimization for LinuxDeploy and WakeLock application. 

4. Change minimum cpu frequency & cpu governer: Change min frequency to 600Mhz and governor to performance. You could use  SmartPack-Kernel Manager 

Astroprint plugin 
First install missing packages: 
sudo apt-get install libjpeg-dev
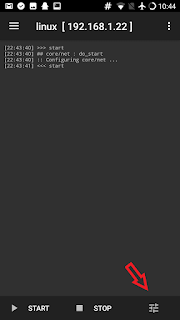
Then you could install it Astroprint plugin from octoprint web page.

Restarting Phone Over Octoprint Webpage
Somekev explained it really well in his website, Here it is: https://somekev.com/2019/04/10/adapting-an-s6-for-octoprint/ 

Temporary Files 

If temporary files uses too much space, at the end your 4gb image could fill and octorint might stop working. Keep an eye on the octoprint main page, under upload file menu you could see the. 

Logfiles of octoprint are located at "/home/pi/.octoprint/logs". Linux temp files are under "/tmp".
Problems 
If i restart my phone, after Linux deploy started, i need to unplug and plug the microusb on phone side, then usb is recognized. 


Klipper on LG G4 - Ender 3 Pro

 I've succesfully installed klipper on my old phone LG G4 with Lineage OS 16.0. If you haven't read  other posts,  lease read them, cause i'm assuming you already accomplished the tasks below: 

Prerequisites

  • Android with printer serial driver installed (ch341 serial driver for Ender3 Pro).
  • Debian Buster installed on Android  (using Linux Deploy, check my post )
  • Updated "sources.list" file 
  • Always on phone (Check my other posts for an always on phone

Setting Klippy-Env Python Version

Python version with Debian buster is 2.7.16 which is ok for Klipper. We just need to install "virtualenv" with "apt". It is possible to install with "pip" but you will have problems with dependencies. use "apt"!
sudo apt install virtualenv
Klipper creates a "klippy-env" folder when installing it, so creating a virtual-env and changing python version in advance helps overcoming problems: 
mkdir /home/pi/klippy-env

virtualenv klippy-env
sudo apt-get install libffi-dev
sudo apt-get install git
source /home/pi/klippy-env/bin/activate

Check python and pip version inside virtualenv (python 2.7.16, pip 20.x)
python --version
pip install --upgrade "pip < 21.0" 
pip install --upgrade setuptools
pip install greenlet
pip install cffi
pip install pyserial

Installing Klipper

You could now start installing klipper (exit virtualenv first) 
deactivate
git clone https://github.com/KevinOConnor/klipper
You need to start installing using klipper scripts (Which is standard installation of klipper). 
/home/pi/klipper/scripts/install-octopi.sh

Klipper Configuration File

In service start file we show printer.cfg file location in /home/pi.  Copy the sample config file to "/home/pi/printer.cfg" and make it readable by any user so that octoprint can read it 
cp /home/pi/klipper/config/printer-creality-ender3-2018.cfg /home/pi/printer.cfg 
chmod 777 /home/pi/printer.cfg 
If you unplug and plug usb, sometimes serial connection changes from TTYUSB0 to TTYUSB1 (like below picture) so it is better to connect to device by its id.

Enable virtual-sdcard from scratch so that you could start printing from lcd screen, and it works faster since klipper is directly sending commands not octoprint to klipper and klipper to printer.

You are still not ready to start klipper, next action is compiling: 

Compiling Klipper for Mainboard

If you can not succeed compiling klipper on a phone, you could do it on a linux and then you could copy the "klipper" folder to your phone. If you don't compile it you won't have the necessary dictionaries etc. and you will have problems. In my case it seems like it was working but when i checked "/tmp/klippy.log", i saw errors of missing build.dict  logs. 

You need to compile klipper according to your printer board, which for my case ATMEGA 1284P 16Mhz for Ender3 Pro standart board (not the quiet one) 

cd /home/pi/klipper/
make menuconfig


then you need to "make": 


So if everything up to here is successful, start klipper and check for logs whether it works without any warning logs etc. Below commands clear log file, restart klipper and check it's status and log files: 
pi@localhost:~/klipper$ sudo rm -rf /tmp/*
pi@localhost:~/klipper$ sudo service klipper restart
Restarting klipper: klipperStopping klipper: klipper.
Starting klipper: klipper.
pi@localhost:~/klipper$ sudo service klipper status
pi@localhost:~/klipper$ cat /tmp/klippy.log


Binding Octoprint to Klipper

Before changing the firmware of your board we need to be sure of 2 things: 
  • klipper and octoprint services are running (above) 
  • Octoprint is connected to klipper 
So you need to bind octoprint to klipper as explained in the page below: 

Next action is changing firmware of your printer and if klipper & octoprint does not work you will loose time either finding the problem or converting your printer back to Marlin.  

Flashing Firmware to Mainboard

To flash klipper to printer, you need determine the serial connnected port by its id. First determine the id: 
ls /dev/serial/by-id/*
It should report something similar to the following:
/dev/serial/by-id/usb-1a86_USB2.0-Serial-if00-port0
You can then flash klipper to printer. 
make flash FLASH_DEVICE=/dev/serial/by-id/usb-1a86_USB2.0-Serial-if00-port0
After flashing, connect your phone (Which klipper is active), and then restart klipper service. 

Fixing Permissions 

If you found out in klipper log that "ttyusb0" permission denied, you need to give permission like below: 
sudo su
cd /
cd dev
chown pi ttyUSB0

- Remove symlink protection (it is not possible in this debian version unfortunately) 

Temporary Files 

If temporary files uses too much space, at the end your 4gb image could fill and octoprint/klipper might stop working. Keep an eye on the octoprint main page, under upload file menu you could see the. 

Folders you need to erase are: 
  • /home/pi/.octoprint/logs/*
  • /tmp/*
  • /var/log/*

PYTHON SCRIPT 

 I created a python script  that clears all log files, restarts klipper and then change the permission of "/tmp/printer" links. ("sudo nano /home/pi/printer.py")
import os,time
os.system(r'rm -rf /var/log/*') 
print r'/var/log cleaned' 
os.system(r'rm -rf /tmp/*')
print r'/tmp cleaned'
os.system (r'rm -rf /home/pi/.octoprint/logs/*')
print 'octoprint logs cleaned'
os.system (r'service klipper restart') 
print 'klipper service restarted'
time.sleep(2)
os.system(r'sudo chmod a=rwX /tmp/printer')
print 'klipper tmp-printer chmod changed'
Then add a system button to restart klipper by using "system command editor" plugin.


I also recommend a Tplink smartplug and its octoprint plugin to remotely power on/off your printer (red thunder icon).

Data and Charging at the Same Time - Connecting Phone to 3d Printer

 There are different methods to connect your phone to charging and use usb data at the same time: 

  1. Connecting Power Source to Phone Battery pins directly (Without any battery)
  2. Connecting Power Sourceto Phone Battery pins directly and solder a resistor to BSI port (Without any battery) 
  3. Using an old battery circuit part to connect power source directly to phone.
  4. Otg Cable With Charging 
  5. Wireless Charging and Data at the same time 

Method 1 : Connecting Power Source to Phone Battery pins directly 

If you are lucky (if you have an old phone), an android phone can work with just soldering + and - sides of your power source directly to the battery pins. 

Whatever your method is, do not use thin cables, use proper thick cables. With thin cables i had problems like reboots (at loading screen, phone reboots again etc)

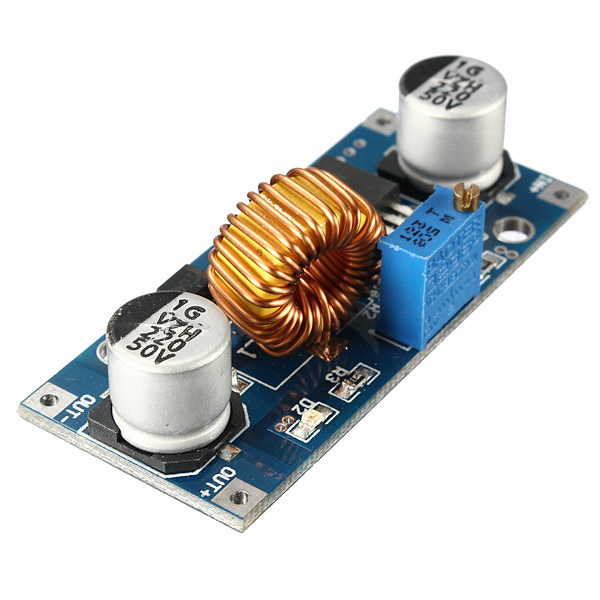
For this you can use a 1$ lm2596 voltage regulator.  (lm2596 can give 3A for short duration, for long usage it is suggested to not go over 2a and using a fan for continuous usages over 1A.)

To be on the safe side, it would be better to use a XL4015 voltage regulator which is around 2$ but could give up to 5A, and more stable for long usage. 


Tune output voltage between 3.6 to 4.2 volts. I tuned it to 4.1 volt.  You can use a usb charger (choose at least a decent one that can give 2a at least, based on the phone you use), or directly connect the regulator to the 24v outputs of the ender3 power supply. 

I first used a tape to fix the cables  to phone pinout (just pull the cables a bit down to make the cables tight and tape it). Red cable is + (1st pin for galaxy s3), black cable is - (3rd pin for galaxy s3) 


Later on i soldered the cables to the pin just to be sure. do not use too thin cables, use a decent one.  

You could use your phone like a battery is connected. You could  power off and on from power button etc. This method might not work with every phone model with removable battery: 

Method 2: Connecting Power Source to Battery Pins Directly & Solder A Resistor to BSI Port

On some phones, phone checks  BSI (battery status indicator) port voltage also. you need to connect ground port to BSI with a resistor between (something between 10k to 100k, you need to find). Check this website: 


I tried it with a LG G3 and 40K was enough (voltage between ground and positive 3.8v, while BSI 3.6 volt) . My LG G3 phone trial failed but now i realised that it was either because of thin cables or bad usb charger. Better to use ender3 24 volt power supply. 

Method 3 : Using an Old Battery Circuit to Connect Power Source 

Newer phones uses all 4 ports of the battery and you can not make the software believe there is a battery connected. The easiest way is using the circuit of and old battery but you need to be careful: 
  • do not short circuit the battery. It is a lithium ion battery and can explode !
  • Be gentle when removing the circuit. If you shear the metal plate from circut, which connects circuit to battery positive-negative sides, you might not be able to resolder it. 


I am using my LG G4 without battery thanks to this method. 

Watch this video for an example: 

Method 4 : OTG Cable With Charging 

Another method that allows for usb functionality and charging is using dock/audio stations if the phone supports it. I still don't like to use a phone with battery for long times, it might be dangerous ! 

It is easy to make a usb otg cable with charging by tricking the phone like it is connected to a station. I used 60k resistor using the diagram below. The only important part when connecting is that power needs to be connected first. I'm not so sure if this cable method works for all phone types. I know that there are kernels that support charging + otg for Nexus 7.


Also cut only the 5V + (red)  cable between the phone and Ender3 for not to power the mainboard of the printer from phone. This way you would be sure that 3dprinter mainboard will be up only if its power supply is up.

If you do not have experince in soldering, soldering a microusb is not that easy, you could do a otg+charing cable using either a microusb male dip (which i could'n find, there is female version only on aliexpress) or male dupont cables like the one below: 


Even those dupont cables might not have the 5th pin on the micro usb side unfortunately (mein was like that unfortunately), better solder microusb on your own. 

Since your phone is going to be connected to plug all the time, you need to find a way to stop and start charging at certain levels. Fortunately there is a program for that (on rooted phones if supported) which could stop and restart charging a when it reaches or falls configured levels. 


I configured it to %65 and %20 to prolong the battery life to maximum.


Method 5 : Wireless Charging and Data At the Same Time 

I haven't tried this method but in some forums i do read that you might be able to charge wirelessly if you set the USB debugging mode to "transfer files only" so it's being used as a data transfer cable, rather than both.

Compiling Kernel For Android ARM64 With Ender-3 Pro ch341 Driver (LG G4)

 Kernel Driver Support to Connect to Ender


For any rom, if you want to connect it to Ender 3, you need "ch341" driver added/activated in the kernel or you need a custom implementation of it (look for octo4a program). You could understand it by connecting the phone with a USB OTG cable to your printer and execute command "ls /dev | grep tty". If  there is "ttyusb" or "ttyacm" , it means that kernel has the driver. If kernel does not have the driver you have two options: 
  1. You need to compile a kernel with driver support. Also keep in mind that kernel needs to support "loopback" functionality to host a virtual linux system and accept/direct connections to that virtual linux over its loopback.
  2. You can install octo4a, which installs custom a ch34x driver. and you need to mount the serial pipe of the octo4a (you can check that part from: https://github.com/d4rk50ul1/klipper-on-android)


Compiling Kernel for ARM64 (LG G4)

If you do not want to bother with all compiling, just download the boot.img that i compiled. It is for  LG G4 H815 International Lineage OS. 

I will be telling the procedure for LG G4 but it should be generally applicable to any ARM64 (not ARM) android phone. Here is the guide i followed if you would like to check: https://forum.xda-developers.com/t/reference-how-to-compile-an-android-kernel.3627297/ 

The kernel used for LG G4 for this specific rom is Titan Kernel and luckily kernel aldready have  ch341 driver, just not activated. 
You need a linux environment to compile kernel (might be possible on windows too). First you need to download the kernel and a toolchain (Google) to compile it. 

We need programs/files listed below: 
  • AIK KITCHEN folder (to split and merge new kernel into boot.img file) 
  • Google Toolchain
  • Kernel folder (new kernel source code)
  • boot.img file (we will replace the kernel in this original image file taken from firm zip file) 
1. Installing prerequisites 
sudo apt-get install libncurses5 libncurses5-dev
sudo apt-get install make
sudo apt-get install git

2. Install google toolchain

cd /home/ercin 
git clone https://github.com/LineageOS/android_prebuilts_gcc_linux-x86_aarch64_aarch64-linux-android-4.9 

3. Download Android image kitchen  and extract it to a folder. (/home/ercin/Downloads/AIK-Linux)

4. Download Lineage OS rom and extract boot.img file

At the end you will have a Download folder  with folders and images like below: 


5. Edit kernel configuration file to include ch341 driver  (you need to find the defconfig file for your phone type, which is generally under /arch/arm64/configs folder inside kernel folder)


6. Compile New Kernel
export ARCH=arm64 && export SUBARCH=arm64
export CROSS_COMPILE=$(pwd)/bin/aarch64-linux-android-
cd /home/ercin/Downloads/elite-boeffla-kernel-lineage14.1-i9300-master/
make clean
make mrproper
make lineageos_i9300_defconfig
make -j$(nproc --all)
7.Now you have the kernel with name Zimage under arch/arm/boot folder: 
/home/ercin/downloads/elite-boeffla-kernel-lineage14.1-i9300-master/arch/arm/boot/Zimage
8. Unpack boot.img (taken from lineage os zip file) and change old kernel with newly compiled one. 

cd /home/ercin/Downloads/AIK-Linux/
./unpackimg.sh /home/ercin/Downloads/boot.img 
cd /home/ercin/Downloads/AIK-Linux/split_img/
rm boot.img-zImage
cp  /home/ercin/downloads/elite-boeffla-kernel-lineage14.1-i9300-master/arch/arm/boot/Zimage boot.img-zImage
cd /home/ercin/Downloads/AIK-Linux/
./repackimg.sh 

Now you have image-new.img file under folder /home/ercin/Downloads/AIK-Linux

8. Install image-new.img file to phone boot section using TWRP

Sunday 12 December 2021

Compiling Kernel For Android ARM With Ender-3 Pro ch341 Driver (Galaxy S3 i9300)

Kernel Driver Support to Connect to Ender

For any rom, if you want to connect it to Ender 3, you need "ch341" driver added/activated in the kernel or you need a custom implementation of it (look for octo4a program). You could understand it by connecting the phone with a USB OTG cable to your printer and execute command "ls /dev | grep tty". If  there is "ttyusb" or "ttyacm" , it means that kernel has the driver. If kernel does not have the driver you have two options: 
  1. You need to compile a kernel with driver support. Also keep in mind that kernel needs to support "loopback" functionality to host a virtual linux system and accept/direct connections to that virtual linux over its loopback.
  2. You can install octo4a, which installs custom a ch34x driver. and you need to mount the serial pipe of the octo4a (you can check that part from: https://github.com/d4rk50ul1/klipper-on-android


Compiling Kernel for ARM (Galaxy S3 i9300)

If you do not want to bother with all compiling, just download the boot.img that i compiled. It is for  CrDroid LineageOS rom install Galaxy s3 i9300s. 

I will be telling the procedure for Samsung galaxy s3 but it should be generally applicable to any ARM (not ARM64) android phone:

So i searched for Lineage os based 7.x kernels on github and found a one with "ch341" driver already included in its folders. 
Good part is that this kernel supports many phones, loopback and usb audio/dock station mode. You need a linux environment to compile kernel (might be possible on windows too). First you need to download the kernel and a toolchain (Google) to compile it. 

We need programs/files listed below: 
  • AIK KITCHEN folder (to split and merge new kernel into boot.img file) 
  • arm-eabi folder (google toolchain to compile kernel) 
  • Kernel folder (new kernel source code)
  • boot.img file (we will replace the kernel in this original image file taken from firm zip file) 
1. Installing prerequisites 
sudo apt-get install libncurses5 libncurses5-dev
sudo apt-get install make
sudo apt-get install git

2. Install google toolchain

cd /home/ercin
git clone https://android.googlesource.com/platform/prebuilts/gcc/linux-x86/arm/arm-eabi-4.8 

3. Download Android image kitchen  and extract it to a folder. (/home/ercin/Downloads/AIK-Linux)

4. Download CrDroid rom and extract boot.img file

At the end you will have a Download folder  with folders and images like below: 


5. Edit kernel configuration file to include ch341 driver  (you need to find the defconfig file for your phone type, which is generally under /arch/arm/configs folder inside kernel folder)


6. Compile New Kernel
export ARCH=arm
export SUBARCH=arm
export CROSS_COMPILE=/home/ercin/Downloads/arm-eabi-4.8/arm-eabi-
cd /home/ercin/Downloads/elite-boeffla-kernel-lineage14.1-i9300-master/
make clean
make mrproper
make lineageos_i9300_defconfig
make -j$(nproc --all)
7.Now you have the kernel with name Zimage under arch/arm/boot folder: 
/home/ercin/downloads/elite-boeffla-kernel-lineage14.1-i9300-master/arch/arm/boot/Zimage
8. Unpack boot.img (taken from crdroid zip file) and change old kernel with newly compiled one. 

cd /home/ercin/Downloads/AIK-Linux/
./unpackimg.sh /home/ercin/Downloads/boot.img 
cd /home/ercin/Downloads/AIK-Linux/split_img/
rm boot.img-zImage
cp  /home/ercin/downloads/elite-boeffla-kernel-lineage14.1-i9300-master/arch/arm/boot/Zimage boot.img-zImage
cd /home/ercin/Downloads/AIK-Linux/
./repackimg.sh 

Now you have image-new.img file under folder /home/ercin/Downloads/AIK-Linux

8. Install image-new.img file to phone boot section using TWRP