Friday 29 May 2020

Octoprint on Android (Galaxy S3) - Ender 3 (Pro)

I have read "installing octoprint on a smartphone" on reddit and decided to do it. Here is my documentation about how to install Octoprint on an Android-Phone (Galaxy S3) 

For any rom, if you want to connect it to Ender 3, you need "ch341" driver added/activated in the kernel or you need a custom implementation of it (look for octo4a program). You could understand it by connecting the phone with a USB OTG cable to your printer and execute command "ls /dev | grep tty". If  there is "ttyusb" or "ttyacm" , it means that kernel has the driver. If kernel does not have the driver you have two options: 
  1. You need to compile a kernel with driver support. Also keep in mind that kernel needs to support "loopback" functionality to host a virtual linux system and accept/direct connections to that virtual linux over its loopback.
  2. You can install octo4a, which installs custom a ch34x driver. and you need to mount the serial pipe of the octo4a (you can check that part from: https://github.com/d4rk50ul1/klipper-on-android


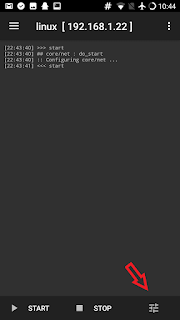
Installing Ubuntu  - "Linux Deploy"

Before installing Ubuntu, be sure to have the serial drivers installed (kernel) on the phone, otherwise you will waste too much time.

1. Install Busybox 
Leave folders as default. 

2. Install LinuxDeploy

Newest Ubuntu that i succeded to install is Debian Jessie, since it depends on the Android kernel version of the phone itself. 

3. Open LinuxDeploy and go to settings and check 
  • Lock-wifi
  • Wake lock 
  • Auto-start
  • Track network changes
  • Track power changes
  • Auto-start delay : 60 seconds is enough 
  • Debug : Useful to understand if something goes wrong (like kernel version is old etc.) 


Go to properties menu and and configure below: 
  • Distribution: debian jessie
  • Architecture: armhf
  • Username: pi    (octoprint scripts are for raspberry-pi installation, pi user will make our job easier)
  • Password: your-password 
  • Installation type: file  (default) 
  • Installation path: $(EXTERNAL_STORAGE)/linux.img  (default) 
  • Image Size: 4000 MB
  • enable ssh
  • Init: enabled 
  • Mounts: enabled
  • Mount points: source: /sdcard  target: /sdcard 

Start installation


To eliminate local network problems, first try to connect to linux over the phone itself. ssh to "localhost"

Change root password with command "sudo passwd root" 

Installing Python & Octoprint

Octoprint needs Python 2.7.9 or newer (Debian Jessie 2.7.9 could be installad). If you have a phone with a newer kernel you could install a later version of Ubuntu/debian and you won't need to upgrade system or venv python.) It is better to install latest python version in a virtual-environment and install octoprint in the same venv.(future octoprint version or klipper might need newer python version)  

1.Change user shell from sh to bash, and close and restart your ssh session. 
sudo usermod --shell /bin/bash pi

2. Upgrade ubuntu and install prerequisites 
sudo apt-get update
sudo apt-get upgrade
sudo apt-get install build-essential checkinstall -y
sudo apt-get install libreadline-gplv2-dev libncursesw5-dev libssl-dev libsqlite3-dev tk-dev libgdbm-dev libc6-dev libbz2-dev -y
sudo apt-get install python-pip python-dev python-setuptools python-virtualenv -y
3. Install python 2.7.17 in virtual-environment
Above packages are needed not to face problems later on (python could be make-install without libz2 etc. but then you might face problems like missing modules....) 
sudo apt-get install wget -y
wget https://www.python.org/ftp/python/2.7.17/Python-2.7.17.tgz
tar xfz Python-2.7.17.tgz
cd Python-2.7.17
sudo ./configure --prefix /usr/local/lib/python2.7.17 --enable-ipv6
sudo make
sudo make install
*if you add  --enable-optimizations to line ./configure   it will add around 30-40 minutes to compiliation but will result in faster python processing. (for galaxy s3 test result was failure)

4. Check python installation 
cd /usr/local/lib/python2.7.17/bin/
./python --version

5. Upgrade PIP (also for virtualenv)
sudo pip install wheel
sudo pip install --upgrade "pip < 21.0" virtualenv virtualenvwrapper --ignore-inst

6.Create and enter into virtual env 
cd /home/pi
mkdir venvs
cd venvs/
virtualenv --python=/usr/local/lib/python2.7.17/bin/python octoprint
source /home/pi/venvs/octoprint/bin/activate

7.Check python and pip version inside virtualenv (python 2.7.17, pip 20.x)
python --version
pip install --upgrade "pip < 21.0" 
pip install --upgrade setuptools
pip --version
8. Install octoprint (inside venv)
pip install wheel
pip install octoprint
8. Start octoprint
/home/pi/venvs/python2717/bin/octoprint serve

Start Octoprint On Debian Boot Automatically
Download necessary script files: 
wget https://github.com/foosel/OctoPrint/raw/master/scripts/octoprint.init && sudo mv octoprint.init /etc/init.d/octoprint
wget https://github.com/foosel/OctoPrint/raw/master/scripts/octoprint.default && sudo mv octoprint.default /etc/default/octoprint
sudo chmod +x /etc/init.d/octoprint sudo systemctl octoprint enable
Change the daemon path in "/etc/default/octoprint" file with vi/nano (whatever text editor is your favorite) to: 
sudo nano 
DAEMON=/home/pi/venvs/octoprint/bin/octoprint

Screen Off - Sleep Problems
For an always on Linux installation on Android, some battery and cpu optimization settings need to be changed otherwise Linux becomes unreachable when screen is of after a while: 

1. Change wifi settings to "keep wifi always on" 

2. Install Wake-Lock: Select "Screen_DIM_wake_lock" option for phone not to (deep)sleep when the screen is off. 

3. Change Battery Settings: Disable optimization for LinuxDeploy and WakeLock application. 

4. Change minimum cpu frequency: 100Mhz minimum frequency is too low, i changed it to 400Mhz. You could use  SmartPack-Kernel Manager or KernelAuditor. 

Astroprint plugin 
First install missing packages: 
sudo apt-get install libjpeg-dev
Then you could install it Astroprint plugin from octoprint web page.

Restarting Phone Over Octoprint Webpage
Somekev explained it really well in his website, Here it is: https://somekev.com/2019/04/10/adapting-an-s6-for-octoprint/ 

Temporary Files 

If temporary files uses too much space, at the end your 4gb image could fill and octorint might stop working. Keep an eye on the octoprint main page, under upload file menu you could see the. 

Logfiles of octoprint are located at "/home/pi/.octoprint/logs". Linux temp files are under "/tmp".
Problems 
If i restart my phone, after Linux deploy started, i need to unplug and plug the microusb on phone side, then usb is recognized. 


Tuesday 12 May 2020

Ender 3 Pro Beginners Guide - Part 2: Printable Upgrades

Printable Upgrades 

One of the best thing about Creality Ender printers is that, it has a huge community and there are many printable upgrades that you could use which increases the quality of your prints. 


Filament Holder 80mm with Bearings
For this part you need to buy 2 bearings. I do think that a filament holder with less friction is a must for quality.  

Also i printed the roller part from a remix(not the one above) which is a curved one, which helps oddly shaped rolls run without an issue


Filament Guide 
If you hang your filament on the top of your printer, use a filament guide to guide the filament to extruder with minimum resistance: 

If you have enough space, print side spool mount to the filament holder, so that filament could stay right next to the printer attached to the ground bars. This way filament roll movement would not create vibration. 


X Belt Tensioner


Y Axis Belt Tensioner

https://www.thingiverse.com/thing:3268192 ender3 pro belt tensioner
https://www.thingiverse.com/thing:3384120/files  not to lose y axis length main body remixed part


Display LCD PCB Cover
LCD PCB is not closed and a cover will help  not to damage it or cause a shortcut. I printed the one below which also allows adding a bipper silencer also
https://www.thingiverse.com/thing:2858209/files (select the version where there is a hole for beep)

Display Ribbon Cable Clip 
to attach display ribbon cable to metal bars, you would need clips. IF you also wanted to print a drawer, either find a one that has empty space for ribbon cable clips, or do not use the clips and take the cable below from the drawer. 


Power Cable Clip
to tidy power cable at behind, you need deeper clips than the ones for ribbon cable. You could use the below clip:

Cable Chain for Z Axis
Extruder, Z axis stepper motor cables sometimes hit the print table and can tackle around. So it is a good idea to tidy them with a cable chain. People sometimes use cable chains for both hotend to extruder, table heat cable, and exturder-z axis cables. These chain cables are a bit noisy so i think only printing it for extruder-z axis stepper motors are enough. Below is the picture of my device

Extruder Knob & Metal Extruder Cable Clip 
If you also use metal extruder (which i suggested in part 1 also), below clip helps to attach the power cable of the fans to the extruder. 


Feet Noise Dampeners


For Noise dampening please watch the video below, it is a much more better solution but you need to find a concrete (like..). block to lay under the printer.


Z Axis Spacer

https://www.thingiverse.com/thing:2959991/remixes adjustable z stepper for  ender3
https://www.thingiverse.com/thing:4295093 adjustable z stepper remix for ender3 pro
https://www.thingiverse.com/thing:2925230 non-adjustable fixthick spacer (read comments section for ender3 pro compability)

Z Axis Lead Screw Stabilizer
I was thinking of using Z axis lead screw stabilizer but than in a comment i read that,top of the z-axis is MEANT to be free-floating to IMPROVE print quality and so i do not use it. Here is the video:


https://www.thingiverse.com/thing:3080912 -->you can find mentioned comment in comments section

Fan Duct 
For a better print quality, cooling is really important. If you do not want to upgrade to 5015 fans and use stock fans, bullseye duct is one of the best fan ducts for ender3 pro. If you are willing to upgrade fans petsfang is the newer model.


Read the thing details carefully since there are many files and versions. Below link shows what to print: 

Bullseye youtube channel:

Installation videos:  
 
There are direct-drive modes compatible with bullseye fan also but i think direct drive modification is not for a beginner, you will need a bit more time have experience before going on to direct drive. 

In the video below, you will see that bridging quality becomes better with Bullseye duct

Tool Holder
I prefer the above one, since it is not on z axis and not adds any space to existing usage. 


1.75mm Filament Clip

Monday 11 May 2020

Ender 3 Pro Beginners Guide - Part 1: Assembly, Extruder Calibration & Heat Tower Test

Ender 3 pro is listed as one of the best budget printers, so i decided to buy one. I could not find a one place that writes everything about what to do, what to tune so i decided to put everything i learned in one place. Let's start: 

Assembly. 

Since Ender3 is half assembled, you need to assemble the parts first. If you assemble your printer the way it should be (not to tight, not too lose ....), you will have less quality problems with your prints.This is the most important part!!!. I do suggest the youtube video for assembly: 


I advise you to buy at least 3 things with your printer and install them from the first day: 
  • TL smoothers for X and Y axis (below video shows how to install it, and how it improves your prints, if you are using the standart creality control board)

  • Metal extruder (since original plastic one errodes with time)

  • A good quality filament (not a black one, you would use many for printable upgrades, and a colorful one looks good on the printer)
  • Capricorn PTFE Tubing (if you will not upgrade to direct-drive immediatly - wtf is direct drive?)

Extruder Calibration 

Before printing anything, i would suggest you to tune your extruder first.
  • Over-extruding, under extruding adjust: Does your printer extrudes the exact lenght you tell it to. 
  • Flow-rate adjust: Walls of your prints are at right thickness ? 
 It is really easy  to configure, i suggest you to watch the video below: 


Cura Slicer Settings and Test Print 

You could now start printing. I use Cura slicing software. Slicer settings change your print quality too much and for a starter it is not easy to understand all those configurations. First use standart cura settings and print a calibration cube. And then use one of Cheps Creality compatible profiles and see the result again:

https://www.chepclub.com/cura-profiles.html  Chep's web page - downloadable profiles.

Chep's profile uses 6mm retraction, it is for people that uses Ender3 with standart bowden setup. If you upgrade to direct-drive or already enabled linear-advance, you need to change the retraction settings. 

In another part i will try to gather information about slicer settings. But to increase quality and stability, ender 3 needs printable upgrades first. 

Heat Tower Test
Each brand and filament type has different characteristics and you need to find the right temperature. and your thermistor might show the temperature a bit wrong. So print a heat-tower and understand the best temperature. For me it was 210C for PLA. 

Cura - go to Extensions, post processing,Modify G-Code
Add Script ChangeAtZ 5.1.1 for each layer to change temperature


Change Height value and Change Extruder 1 Temp to the values below

Height = 1.6
Temp: 235

Height = 11.6
Temp: 230

Height = 21.6
Temp: 225

Height = 31.6
Temp: 220

Height = 41.6
Temp: 215

Height = 51.6
Temp: 210

Height = 61.6
Temp = 205

Height = 71.6
Temp: 200

Height 81.6
Temp: 195

You could watch the heat-tower part of teaching tech video: 
https://youtu.be/3yIebnVjADM?t=266