After installing klipper for quality, i wanted to convert my bowden Ender3 pro to a direct drive printer. I found the "speed drive v1" design made by "sashalex007" which mostly uses stock parts and he achieved a great result with 100mm/s wall speed. https://www.thingiverse.com/thing:3816051
The part that i would not like about the design is that you loose some x space (not much) which lead me to search for the remixes at start, and i found 2 remixes that uses Banta mount design but at the end after having many problems decided to use the original design with some tweaks.
For not to loose x space, you need to change Y motor with the extruder motor. Here are my installation instructions:
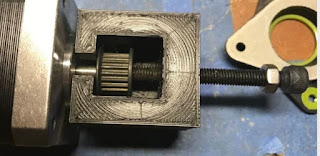
1. Some Ender3 devices came with press fit pulleys on Y axis, so before starting the job, print a pulley extractor.
I printed extractor with %100 infill (PLA) and it worked. But second time (when i'm using it for a friend) it cracked, so print 2 of them just in case.
And if you own such an Ender with a press fit pulley Y motor, you need to buy a 20 teeth G2 belt compatible 5mm diameter and 6mm width gear (since press fit ones can't be used again)
2. You need to print a leveling knob smaller than the default 60mm. When you change the Y motor with the larger extruder, the knob on back left side hits the motor just before touching the Y switch.
3. You need 6 m5 washers (2 for each wheel), be careful to buy standard ones like in photos below. Outer diameter need to be small, otherwise it will touch to the moving parts of bearings and creates friction. Using the 6 washers you gain 1-2 mm and you need it, otherwise motor hits the vertical colums.
4. You need either a usb cable, than you can extend extruder cable by soldering it or you need a fabricated cable to extend extruder cable which is a lot easier ( 6pin female-male nema step motor cable)
If you choose to solder yourself be careful to mark the cables, otherwise you could solder it wrong. Some usb cables have thinner cables for data, so check if they are too thin or not, use something good. After soldering, try moving the extruder motor from marlin menu but don't forget about cold extrusion prevention mechanism. Ender3 default marlin settings prevent you from moving the extruder motor when the hot end is cold.
5. You need some plastic cable zippers to tidy cables. Below is the best cabling orieantation i could find which could reach the top right corner of the printer without cables passing inside the frame.
6. You could use the stock fan or you could use a 24v blower fan with an adapter to mount it to Bullseye.
7. You need to print speeddrive mount, bullseye base (From speeddrive page), and bullseye from its own page. Read bullseye installation on it's own page (you will need m3 nuts and button head 12mm bolts for ender3 pro installation )
The good part about using bullseye is that extruder is easily reachable, and it is easy to level the duct bottom. During installation just use the wrench that comes with Ender3 Pro like below.
You could also use Petsfang if you own a 5015 fan, like the guy here https://www.thingiverse.com/make:794919
Testing
Below 20mm test cube is printed with 100mm/s infill and 70mm/s wall speed, 1250 acceleration and at 0.2mm resolution using klipper (and settings are tuned for klipper). You could achieve higher values with a stable shelf, mein is a bit shaky.
Cube test should not be your only method to evaluate. Print a micro 3d printer test object. Here are my results:
You could do a water turbulence test to understand if bullseye is mounted in right position:
FAILURES
If you also would like to check what i tried before being successful, you could read this part. I checked the designs below not to loose x space with speeddrive design:
- First one: https://www.thingiverse.com/thing:4322768
This design changes Y and Extruder motor (Y motor is shorter) which results in full X usage and lighter moving parts. And also the blower fan sits to banta mount without and adapter (e.g. to rotate a bit not to to hit the extruder )
- Second one: https://www.thingiverse.com/thing:4245035
This has an adapter that rotates the blower fan 45 degrees.
First I chose to go with the first design and at the end succesfully had a direct drive. I then decided to do a printer test print and my result was not good (x cube looked ok !):
I then did the water-turbulence test and saw that the cooling is misdirected (it is either wrong installation or there was a problem with the base bart design for banta mount, i don't know).
.I decided to go back to Bullseye but with an adapter and wrote this documentation :).


0 comments:
Post a Comment